CLICK HERE FOR FREE BLOGGER TEMPLATES, LINK BUTTONS AND MORE! »
Showing posts with label birthday. Show all posts

Sunday, February 19, 2012

Diary of a Wimpy Kid Birthday Party

My husband and I have always loved to read, and I'm so glad that my son followed that love of reading.  His favorite books to read are the books of the Diary of a Wimpy Kid series by Jeff Kinney.  He's read all six books, multiple times, so it was no surprise when his 8th birthday rolled around that he wanted to celebrate Wimpy Kid style!


I found some fantastic inspiration on Pinterest and used some party details from different events to create a fun time for my son and his friends.

First, I started with the invitation.  And when I saw THIS cheese invitation from Cap Creations, I knew this was the one we would have to recreate!  I printed our party details onto yellow cardstock, cut them out into 5 inch squares and used my 1 inch hole punch and regular hole punch to add the holes to the cheese slice.  I then went back and used brown, orange and green ink pads to add the gross coloring to the cheese (using a q-tip).  We also included an extra slip of paper telling the guest, "You've got the cheese touch!"


We did a simple color scheme - black and white, like the drawings in the books, with a pop of red, like the color of the first book.  We had black, white and red balloons and I made a felt banner in the same colors with his name.


We even added our own stinky cheese to the front porch.  I took a slice of swiss cheese and colored it with markers.  Unlike the characters in the book, our guests had no problem picking up the cheese to gross everyone out!


My son decided to have a movie party, but we added in a few games to play in the beginning while we waited for all the guests to arrive.  We played Fregley's Sayings.  For this game, each guest received a slip of paper with something that Fregley says.  They had to read it, but their lips had to cover their teeth when they said it.  If you laughed you got eliminated, and the last person standing was the winner.  "Can you chew gum with your belly button?"

We also played the Secret Word game.  For this game, the player needs to get the group to say the secret word on their card, but without saying any of the forbidden words.  For example, one of the secret words was "diary" but the player was not allowed to say book, journal, red, wimpy or kid.

Did you know there were a few event kits released at the time of some of the books' releases that you can download for free?  That's where we found these two games.  You can download the Dog Days Event KitThe Ugly Truth Event Kit, and the Cabin Fever Event Kit.

The last game we played was Mixed Up Wimpy Kids, and my son actually came up with this game idea.  Each player receives a recording sheet and a pencil.  Everyone takes a turn rolling the die.  Each number on the die represents a part of the character they are going to draw.  For example, if they roll a 1, they draw the head.  But since this is the Mixed Up Wimpy Kid game, they roll the die again to find out which character's body part they draw.  We assigned each number on the die a body part and a character from the books.  So, the kids ended up with some crazy mixed up characters with Fregley's head and Rowley's body, wearing Loded Diper t-shirts and sporting mohawks!  Even the names got mixed up!


While watching the movie the kids had pizza.  Then about halfway through, we held an intermission where the kids could fill up treat sacks with popcorn, pretzels, and candy.

After the movie we had cake and ice cream.  Here is the cake I made.  It's a vanilla cake, with cream cheese frosting and covered in fondant.  The lettering, cheese and squares on the top cake are all made of fondant.  The character faces were piped on using royal icing.  The figures holding the letters of his name are actual action figures.


For party favors I made diaries (I mean journals) for each guest.  I bought the little notebooks at the Dollar Tree and covered them with THESE free printables from the Kenner Road blog - they worked out perfectly!
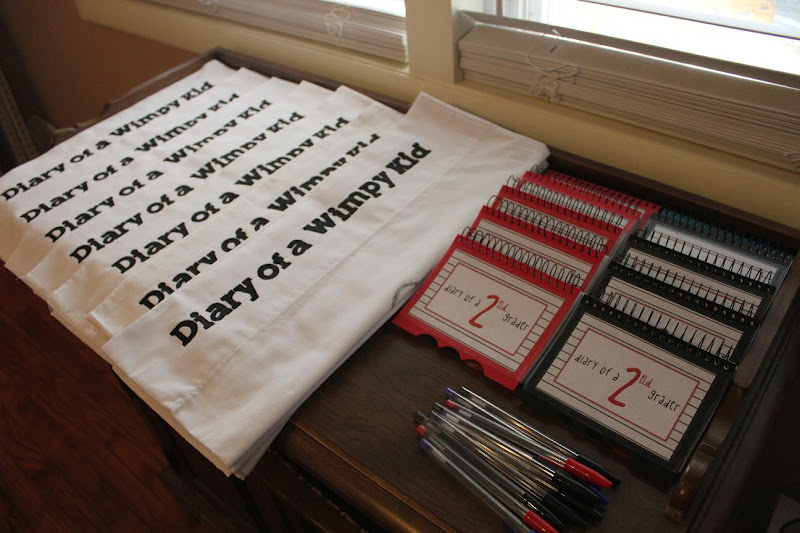


I also created these Diary of a Wimpy Kid pillowcases for each guest.  I bought standard size white pillowcases from Walmart.  I used the freezer paper stencil technique to put "Diary of a Wimpy Kid" along the edge and used the crayon on sandpaper technique to put Greg and Rowley's images in the center of the pillowcase.  These were also a big hit!


The last thing we did was write thank you notes to our guests.  We typed a template for our thank you notes using Greg's thank you notes from the first book.  They were pretty funny and a great end to the Wimpy Party!


If anyone is interested, I can share the files from the Mixed Up Wimpy Kid game.  Files include the directions and recording sheets.  All of the images I just traced onto cardstock from online resources.  Just send me an email at themuddyprincess@gmail.com .

Monday, August 1, 2011

Pirate Princess Birthday Party

My daughter recently celebrated her 5th birthday with a Pirate Princess party.  My inspiration came from Jake and the Neverland Pirates, a new show on Disney Junior, and one of her favorites.

I started by making this invitation to send out to all her pirate friends.  I found the adorable pirate girl graphics HERE.


With the extreme heat, we knew this year's party would definitely need to revolve around the pool, so the decorations went up around the pool area. 

I made the "Pirate Lagoon" sign on a piece of butcher paper and attached it to a hula hoop coverd in black crepe paper.  The pink bunting was made from a vinyl shower curtain I bought on clearance at Target.  I cut out the triangles and sewed them together.


I purchased the white net from Oriental Trading Company and made the pink/black/white scrap banners with some leftover fabric I had.


I did add this extra bunting and wooden X in our front yard by the mailbox.  This would help guests find where X marked the spot for the party!


For the party, we provided some pirate goodies for our guests.  Pirate friends who attended, each received a pirate bandana and a handmade eye patch.  For the eye patch I purchased stretchy headbands and sewed on a pirate patch shape cut from felt.  The pink designs were cut using my Cuttlebug, and attached with sticky dots.


I made newspaper swords for big brother and his friend, following the tutorial at Filth Wizardry.  The pirates also decorated a wooden treasure box.


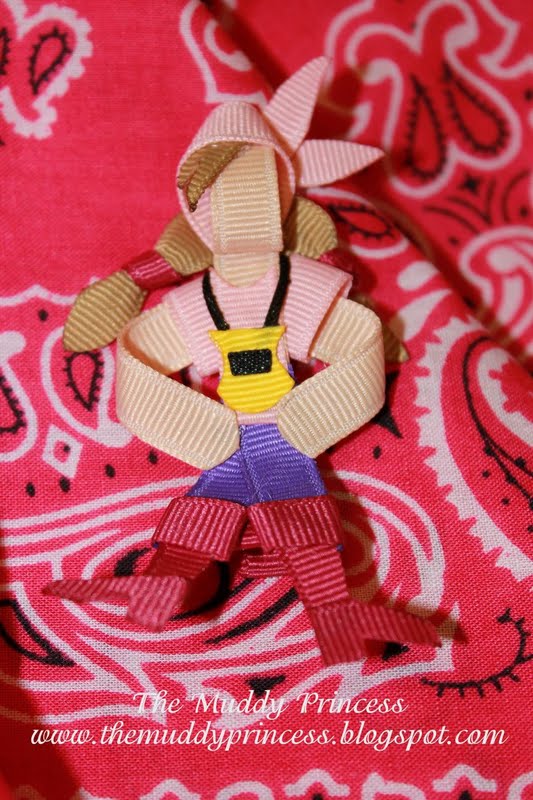
The birthday pirate princess had a special outfit to wear for the day as well.  I didn't get many pics of her in this because most of our time was spent in the pool.  I made the pirate skirt a while ago and created this shirt to go with it.  And Heather, over at Celtic Tide Creations, was kind enough to create this Izzy (from Jake and the Neverland Pirates) hair clip.


Besides lots of giggling and splashing in the pool, the pirate friends also went on a treasure hunt.  I made up some clues for the kids to follow.  To make them look old, I tore the edges of the paper, then soaked each piece in a bowl of soda and soy sauce.  They ended up with this nice vintage looking color.


The pirates found the treasure where X marked the spot -  in the sandbox!  Then everyone gathered around to collect their loot and add it to their treasure boxes they decorated when they arrived.  Treasure included rings, necklaces, pirate coins and tattoos.  I even made some of the pretty pink pirate coins into old looking coins for big brother and his friend using gold spray paint and brown acrylic paint.


Of course, no party is complete without a birthday cake.  Here is the cake and cupcakes I made.  The same graphics I used for the invitations were the same ones I used for the cupcake toppers.


It was a fantastic party had by all!  My daughter had a blast celebrating with her pirate princess friends.  Seeing all those big bright smiles behind pink frosting covered faces and pink bandana covered heads was all the proof I needed to know, "this was the best birthday ever!"  :)


Sharing our party at the following blogs:

Wednesday, March 9, 2011

Science Birthday Party

My son celebrated his 7th birthday last month, but because of our trip to Disney, we just had his birthday party this weekend.  He really loves Science, so he requested a Science party this year.  This was also the first year he had a party with just friends from school, so he was extra excited.

I was lucky enough to find this free printable science invitation over at Living Locurto - thanks Amy!


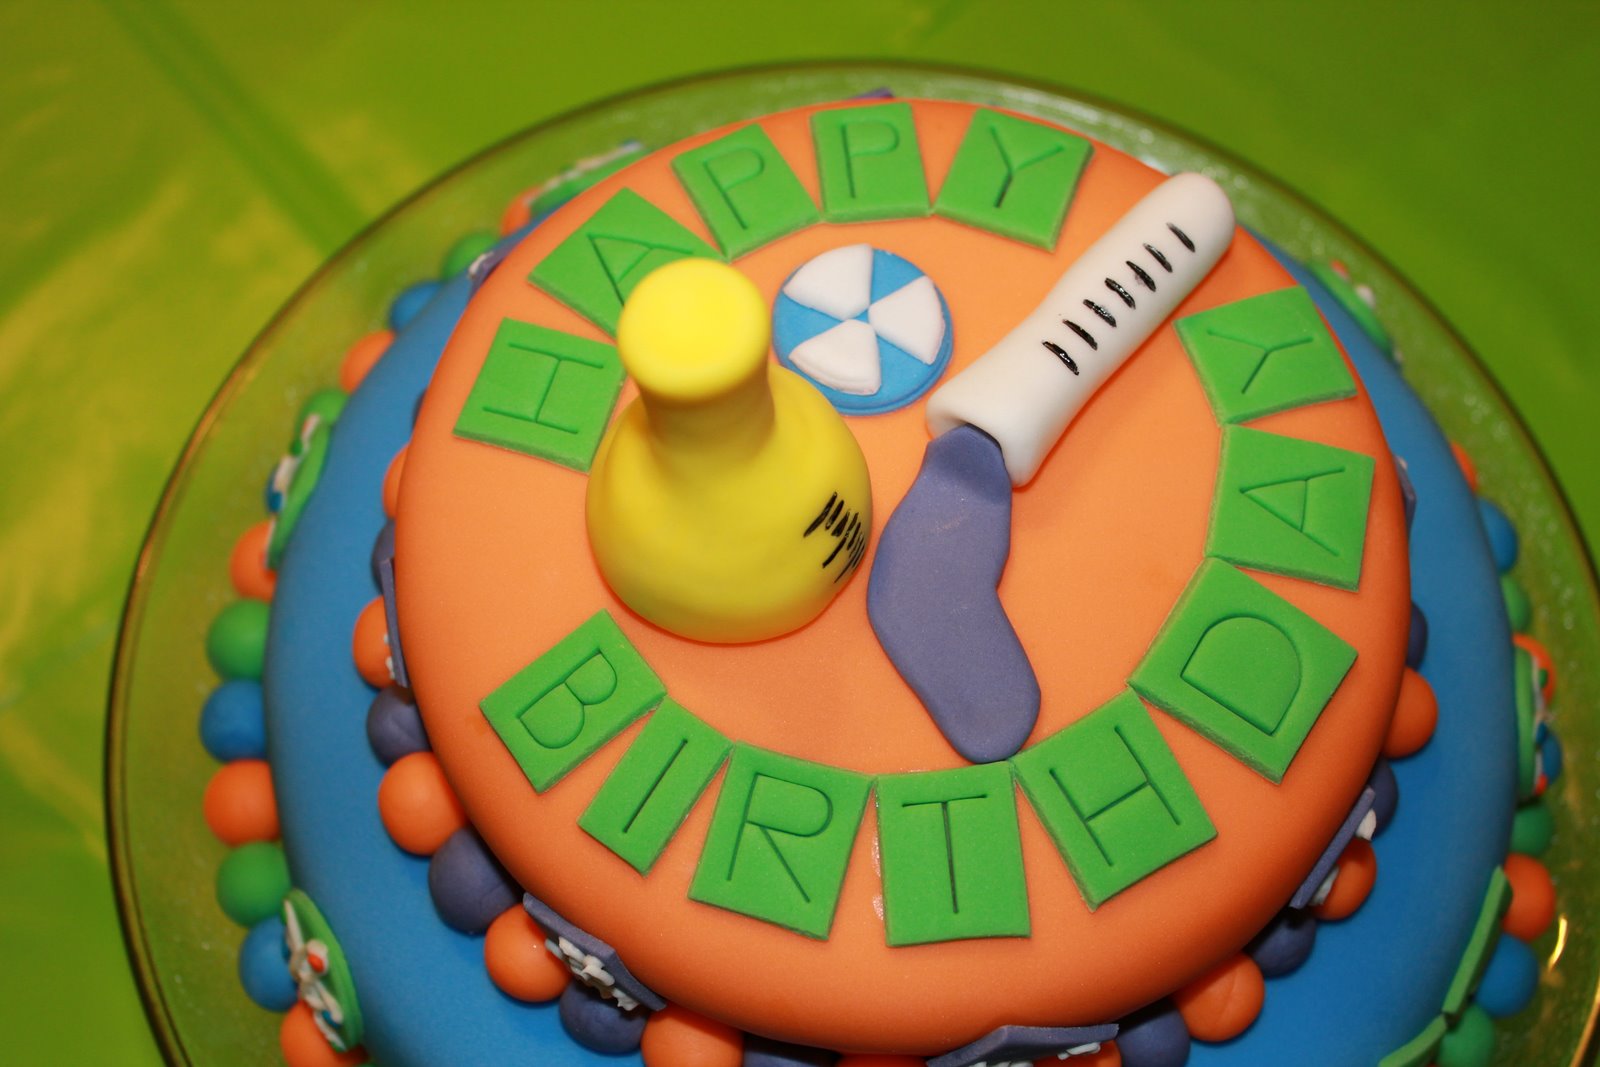
After mailing the invitations I started work right away on the cake, decorations, and party details.  For the cake, I ended up doing a two tier cake, covered in fondant and with lots of science details.  The colors were vibrant and the details turned out well.  Best of all, my son loved it!


For the decorations, we used a lot of my son's science things.  We filled some flasks with radioactive rods (aka glow sticks) and candy to match our cake colors (green, orange and blue).  We also filled his plastic test tubes with candy Nerds - they looked like some mysterious potions bubbling up.


We added his shark in a jar, shark teeth, and some of his favorite rocks from his rock collection to our display as well.


And, we made this banner reading, "Kaden's Lab," with paper plates linked together with pipe cleaners.


Each kid scientist who attended would receive their own clipboard with investigation sheets, a pair of goggles and a scientist badge.  I purchased the mini clipboards from Target for $1 each in the Dollar Bins and the plastic badge covers (10 pack) at the Dollar Store for $1.


As the kid scientists arrived, they used the hand scan to obtain access to the laboratory.  I saw this idea over at The Celebration Shoppe's blog.


We started our science party with a free exploration using magnets.  I filled a large container with some sand from our sand box and filled it with different metal items.  The kid scientists used magnets to find the hidden items and drew pictures of them on their investigation sheets.


Our second investigation was called Drops on a Penny.  The kid scientists made predictions about how many drops of water would fit on a penny, nickel, dime and quarter, then used pipettes to test their predictions and record their results on their investigation sheets.


Sink and Float was our third investigation.  Each kid scientist had a turn to pass an object around the table, then test it in the water to see if it would sink or float.  They recorded their predictions and results on their investigation sheets.


Our fourth investigation was Color Lab.  The kid scientists practiced mixing colors on their investigation sheets using colored water and pipettes.

\


The fifth investigation was creating constellations, using dark colored paper and star stickers.  We talked about what a constellation was and the kid scientists used their star stickers to create their own picture in the sky and used a piece of chalk to connect-the-stars to show their design.  I didn't catch a picture of this one.

The Milk Lab was our last investigation.  In a shallow dish, I poured some whole milk, then put drops of food coloring in a circle in the center of the dish.  I dipped a toothpick in some dish soap (we used Dawn) and placed it in the milk in the center of that circle of food coloring.  The reaction is really cool!  I purposely did not take a picture of the reaction, so you could be just as surprised when you try it yourself.  The kid scientists drew pictures on their investigation sheet to show what happened.


We had some basic snacks, drinks and food for the party.  We covered these mini water bottles with H2O labels that my husband made up.


We also had rainbow spectrum fruit strips (aka fruit roll ups), marshmallow molecules, cheddar explosion goldfish, and pretzel pinwheel atoms.  And of course there was every scientist's favorite fuel food - pizza!


All in all, I think the party turned out great!  The kid scientists seemed to have a lot of fun; even my son's teacher said that some of the kids wrote about the party in their journals Monday morning.  As a former teacher, I had fun too, getting back into teacher mode for a bit.


Many of our other Science items were purchased from American Science and Surplus.  If you haven't checked them out, you must!  

I don't believe I can share a link for my documents, but if you are interested in having a copy of any of the science investigation sheets or the kid scientist badges, just shoot me an email at themuddyprincess@gmail.com and I will email you the files.


Sharing this party on the following blogs:

Fireflies and Jellybeans          A Vision to Remember
Paisley Passions          Craft Envy
Yesterday on Tuesday          Funky Junk Interiors
What Allie's Making Now          Along for the Ride
Suzy's Artsy Craftsy Sitcom          Tatertots and Jello
Momnivore's Dilemma          While He Was Napping
733 A Creative Blog          Be Different Act Normal
Home Sweet Farm          Naturally Me Creations
Momma's Kinda Crafty          It's a Crafty Life
Fingerprints on the Fridge
Fun to Craft
Home is Where My Story Begins
A Little Knick Knack
Finding Fabulous
Lit and Laundry
Chic on a Shoestring Decorating
504 Main
The Shabby Nest
It's a Hodgepodge Life
Kojo Designs
A Few of My Favorite Things
Punkin Seed Productions
Antique Texan
Truly Lovely