Every year, my kids write a letter to Santa. This year's wishes include scooters, mighty beanz and princess dolls.
And every year, my kids get a letter from Santa in the mail, addressed to them, with a North Pole postmark and everything! They are always so excited! How do I do it? Do I spend $9.99 for that special letter from an online Santa letter factory? Nope! I do it practically for nothing, except for a little creativity of course.
After my kids write their letters to Santa, I secretly write a letter to them from Santa. I make sure to include the most important details, like items from their wish list, big accomplishments at home or school and names of family members or friends.
I use a pretty piece of holiday scrapbooking paper to either write or print the letter onto. Then I place it in an envelope (with Christmas magic, aka glitter) and address the envelope to them and put Santa's name as the return address. Don't forget the stamp!
Then, I put that sealed envelope into another plain envelope, stamp it and address it to here:
North Pole Christmas
Cancellation Postmaster
5400 Mail Trail
Fairbanks, Alaska 99709-9998
If you get it in before December 15th, your response will have an official postmark from the North Pole and will arrive in time for Christmas. It has worked for us every year!
Monday, November 29, 2010
Wednesday, November 24, 2010
Thankful Banner
I mentioned I was working in my son's first grade class yesterday. His teacher was in a meeting while I was there, so I took that opportunity to ask each of the kids why they were thankful for her. I wrote down each of their responses on a card. I found this "I am thankful" printable at Family Fun that worked perfectly.
I took each of these cards and stitched them to a square of felt. I laid them all out in a design that would work as a banner and used hot glue to attach twine to the back to keep them all together (thanks to my husband for that quick and easy idea). I added a dowel at the top with twine so she could hang it.
She loved it, especially the picture of the class in the center of the banner.
Curious to know why first graders are thankful for their teacher? When you have a teacher as kind and caring as she is, you get quite an array of responses. Here are a few. :)
* She never gives up on us.
* She's very nice and very happy.
* She doesn't get grumpy.
* She lets us play football outside.
* She reads to us.
* She's nice and doesn't scream.
* She teaches us math.
* She thanks you for helping out.
* She helps us when we need help.
* She helps me sound out words.
I took each of these cards and stitched them to a square of felt. I laid them all out in a design that would work as a banner and used hot glue to attach twine to the back to keep them all together (thanks to my husband for that quick and easy idea). I added a dowel at the top with twine so she could hang it.
She loved it, especially the picture of the class in the center of the banner.
Curious to know why first graders are thankful for their teacher? When you have a teacher as kind and caring as she is, you get quite an array of responses. Here are a few. :)
* She never gives up on us.
* She's very nice and very happy.
* She doesn't get grumpy.
* She lets us play football outside.
* She reads to us.
* She's nice and doesn't scream.
* She teaches us math.
* She thanks you for helping out.
* She helps us when we need help.
* She helps me sound out words.
Thankful Handprint Turkeys
I was lucky enough to spend some time in my son's first grade class yesterday to do a fun Thanksgiving craft with them. For this activity you need a sturdy paper plate, ink pad/paint, markers, paper for feathers and decorative squares, and glue.
Each child used an ink pad to stamp their handprint on the plate. Next, they wrote something they were thankful for on each of the four feathers. They cut the feathers out and glued them onto the fingers on their handprint. They used markers to add details to their handprint turkeys (eyes, beak, wattle, feet). And last, they glued the small squares of paper around the edge of their plate as a decoration.
The kids worked really hard on these and they all turned out really well. Here is a picture of my son's thankful handprint turkey (see the extra details on his turkey - don't ask, when you have your own 6 year old son, you'll understand).
Each child used an ink pad to stamp their handprint on the plate. Next, they wrote something they were thankful for on each of the four feathers. They cut the feathers out and glued them onto the fingers on their handprint. They used markers to add details to their handprint turkeys (eyes, beak, wattle, feet). And last, they glued the small squares of paper around the edge of their plate as a decoration.
The kids worked really hard on these and they all turned out really well. Here is a picture of my son's thankful handprint turkey (see the extra details on his turkey - don't ask, when you have your own 6 year old son, you'll understand).
Friday, November 19, 2010
Free Thanksgiving Printables
With Thanksgiving less than a week away, I've been wanting to do all kinds of fun crafts. But, with two sick kids at home this week, no one was really in the mood. Although we did manage to fit in a few fun printables to keep us busy. While the kids are on the mend, and I have a moment, I wanted to share with you some of the free Thanksgiving printables out there.
- You can find a bunch of free printables at Family Fun.
- There is a list of 10 free printables over at Skip to My Lou.
- Another list of 12 free printables over at Tip Junkie.
- Educational printables at Education.com.
- Fun printables at Kaboose.
- More educational printables at The Education Center.
- Thanksgiving printables at DLTK.
- Some fun printables from Parents.
- Cute turkey masks at Animal Jr.
- Free Thanksgiving printables from Nick Jr.
- Printables from Crayola.
- A great preschool pack of printables from 1+1+1=1.
- A wonderful array of printables at Living Locurto.
Monday, November 15, 2010
Mommy & Me Journal
My son is in the first grade and loves to write, so I thought a while back about making him a personal journal just for his writing. Then I heard about an idea for the parent to write back and forth in the journal with the child. I loved this idea! I already write a little note and stick it in his lunch box each day, but this way, we would have more room to talk about anything.
I started off with a simple black and white composition notebook.
Then, I used spray adhesive to attach some coordinating scrapbooking paper to the outside and inside of the book. I had these family pages, one with "Mother" and one with "Son" that seemed perfect for this project! I also added a piece of paper that looks like lined school paper to the inside front cover to write a little note to him about what the book is for.
Last but not least, I took a piece of wide ribbon and sealed the edges. This would serve as our bookmark so we can find our page.
He found it this morning and was so excited to write to me! We've already written back and forth once and I promised him another entry while he was in school today. What does he like most about this? That it is just for the two of us. I like having that one-on-one time with him too. <3
I started off with a simple black and white composition notebook.
Then, I used spray adhesive to attach some coordinating scrapbooking paper to the outside and inside of the book. I had these family pages, one with "Mother" and one with "Son" that seemed perfect for this project! I also added a piece of paper that looks like lined school paper to the inside front cover to write a little note to him about what the book is for.
Last but not least, I took a piece of wide ribbon and sealed the edges. This would serve as our bookmark so we can find our page.
He found it this morning and was so excited to write to me! We've already written back and forth once and I promised him another entry while he was in school today. What does he like most about this? That it is just for the two of us. I like having that one-on-one time with him too. <3
Sunday, November 14, 2010
Beanbag Chair Cover
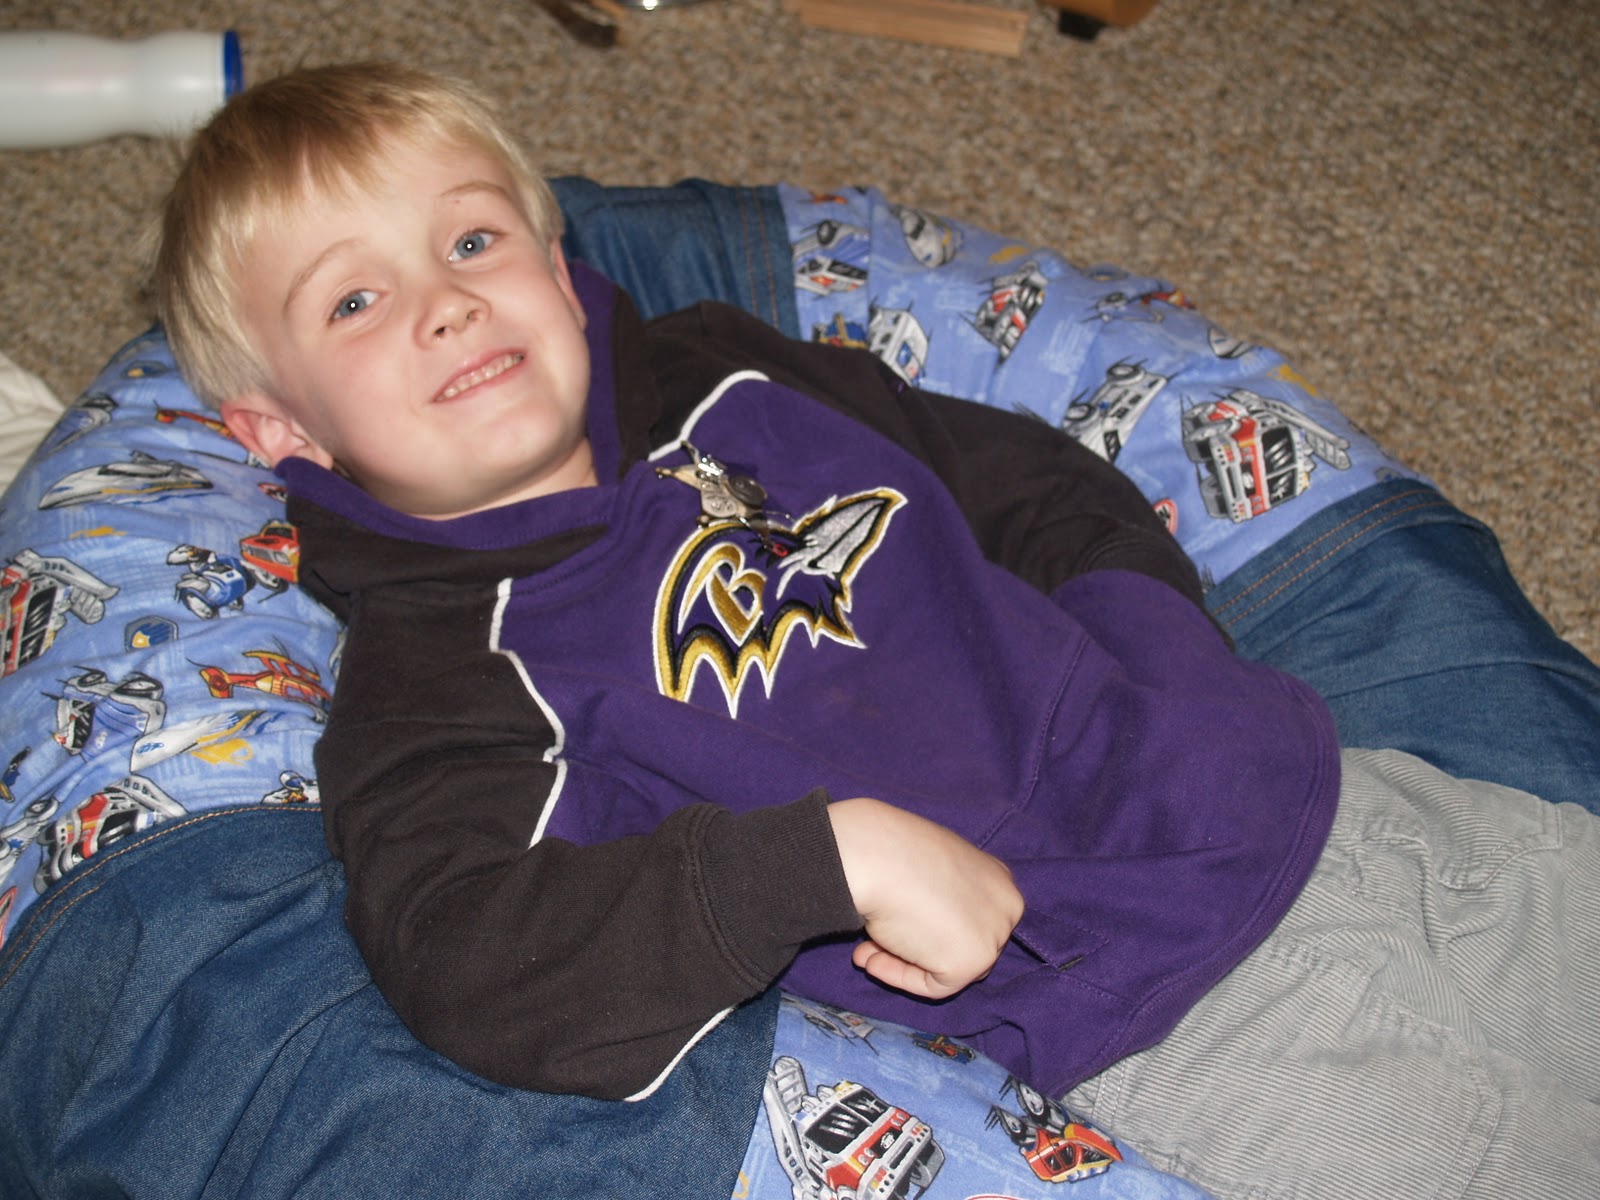
My son loves his beanbag chair, but the cover has been tearing and now those little filling beads have started spilling out all over the place.
Since I had some leftover boy fabric, I decided to try my hand at making a cover. I used some cotton flannel Matchbox fabric and lightweight denim fabric (leftover from curtains I had to hem). I cut them into equal size rectangular panels, 3 of each and stitched them together.
Next, I used another piece of the denim fabric to create a circle that would connect all the panels at the top. Instead of doing another circle piece on the bottom, I created a hem and added a drawstring. This would allow for easy removal of the cover if it needed washing.
This was one of the easiest projects I've done and I'm really pleased with how it turned out. My son is happy to have his beanbag chair back.
Since I had some leftover boy fabric, I decided to try my hand at making a cover. I used some cotton flannel Matchbox fabric and lightweight denim fabric (leftover from curtains I had to hem). I cut them into equal size rectangular panels, 3 of each and stitched them together.
Next, I used another piece of the denim fabric to create a circle that would connect all the panels at the top. Instead of doing another circle piece on the bottom, I created a hem and added a drawstring. This would allow for easy removal of the cover if it needed washing.
This was one of the easiest projects I've done and I'm really pleased with how it turned out. My son is happy to have his beanbag chair back.
Saturday, November 13, 2010
Christmas Activity Chain Link
Every year, my kids and I make a Christmas countdown chain link. A couple of years ago, I came up with the idea to write a little activity inside each chain link. It worked out really well that first year, and we've continued to do it ever since - Christmas wouldn't be the same without it!
I like to start our chain link the week of Thanksgiving, because we all know that as soon as we see that Thanksgiving Day parade on tv with Santa at the end, that the holiday season has officially begun. Not to mention, I LOVE Christmas, and want to spend as many magical moments with my children as I can!
I'm hosting a little get-together next Friday to help some friends put together their own Christmas countdown chain links and thought I would post some of our favorite activity ideas for those of you who would like to make your own chain link as well.
Here's a list of our favorite activities (in no particular order) we have done over the past couple of years:


Do you have other ideas to share? Please comment here to tell us some other fun activities you could do with your children during the holiday season. We are always looking for new ideas!
Our first year with the Christmas chain link. My little man was only 2!
- Have a Christmas movie night.
- Make reindeer food.
- Decorate the tree.
- Have a Christmas scavenger hunt.
- Drive around the neighborhood to see Christmas lights.

- Deliver homemade goodies to neighbors.
- Visit Dutch Wonderland for Christmas.
- Make pinecone bird feeders.
- Wrap Daddy's present.
- Bake cookies.

- Wrap brother/sister's present.
- Kids decorate a tree for their bedroom.
- Make Christmas cards for classmates.
- Make pinecone Christmas trees.
- Make handprint/footprint ornaments.

- Make teacher's gift.
- Exchange gifts with friends.
- Visit the train garden at The Shops at Kenilworth.
- Make paper snowflakes.
- Make gingerbread houses.

- Pick out a new ornament for the tree.
- Watch NORAD to track Santa.
- Make handprint wreaths.
- Visit Valley View Farms to see the Christmas decorations.
- Write a letter to Santa.

- Watch the Thanskgiving Day Parade on TV.
- Help set up the train garden.
- Go Christmas caroling.
- Do Christmas stained glass paintings.
- Make snow dough.

- Bring out our Christmas books.
- Mail Christmas cards.
- Make beaded snowflake ornaments.
- Make wrapping paper with paper and stamps.
- Visit the KKI's Festival of Trees.

- Make marshmallow snowmen.
- Make pipe cleaner chain link garland.
- Make Christmas pictures on the Lite Brite.
- Open Christmas Eve present (pj's).
- Do a tree-dot painting.

- Watch the Lighted Boat Parade at the Inner Harbor.
- Help put up outside decorations.
- Visit area mall to see tree lighting.
- Visit the library to check out Christmas books.
- Visit Santa.
- Christmas Storytime at the library.
- Make Christmas tree shaped recycled crayons.
- Make a Christmas wish list.
- Make candy cane patterns.
- Play Christmas BINGO.
Do you have other ideas to share? Please comment here to tell us some other fun activities you could do with your children during the holiday season. We are always looking for new ideas!
Tuesday, November 9, 2010
Freezer Paper Stencil
Have you heard of freezer paper stencils? They are just about the coolest thing ever! I've seen them around all over the blogging world and just recently had the chance to try them out.
How it works, is you trace your design on the plain side of the freezer paper and use a Xacto knife to cut it out. Then you iron the freezer paper onto your piece of clothing, shiny side down. After making sure all the edges are ironed down well, you fill in the stencil with paint. Fabric paint gives the best result, but acrylic craft paint works pretty well too. When the paint is dry, you peel off the freezer paper and that's it!
I used a freezer paper stencil to create this shirt for my son's school fundraiser at school, Race for Education. I think it turned out really well, and he'll look totally cool running to help raise money for his school!
How it works, is you trace your design on the plain side of the freezer paper and use a Xacto knife to cut it out. Then you iron the freezer paper onto your piece of clothing, shiny side down. After making sure all the edges are ironed down well, you fill in the stencil with paint. Fabric paint gives the best result, but acrylic craft paint works pretty well too. When the paint is dry, you peel off the freezer paper and that's it!
I used a freezer paper stencil to create this shirt for my son's school fundraiser at school, Race for Education. I think it turned out really well, and he'll look totally cool running to help raise money for his school!
Monday, November 8, 2010
Reusable Felt Gingerbread House
I made this reusable gingerbread house for my kids last year and really wanted to share it with you now. I'm making another one as a gift for my daughter's preschool class, so thought this would be the perfect time to show you how I did it.
I started off by checking our recycling bins for old boxes I could use for the house. I'm sorry I didn't mark down my measurements, I just cut the pieces to the size I wanted the house to be. Those are the 2 roof pieces, 2 end walls and 2 long side walls.
I used my hot glue gun to glue the pieces together.
Next, I used a combination of spray adhesive and hot glue to attach the brown felt to the sides. I started by adhering the felt to the end walls first, with pieces cut to match.
Then I adhered a longer piece that covered the long side wall, across the roof, and down the other long side wall.
I used the hot glue to fold over and keep the short ends down.
I used hot glue to adhere large white rickrack to cover the ends and add a decorative touch.
I glued the house to a base made from a thick piece of cardboard covered in batting. Then I used my felt scraps to cut out a door, windows and lots of yummy candy to decorate the house with over and over again!
This was SO EASY to make! The longest part was cutting out all those cute little candy decorations, but it was totally worth it, because my kids love it!
I started off by checking our recycling bins for old boxes I could use for the house. I'm sorry I didn't mark down my measurements, I just cut the pieces to the size I wanted the house to be. Those are the 2 roof pieces, 2 end walls and 2 long side walls.
I used my hot glue gun to glue the pieces together.
Next, I used a combination of spray adhesive and hot glue to attach the brown felt to the sides. I started by adhering the felt to the end walls first, with pieces cut to match.
Then I adhered a longer piece that covered the long side wall, across the roof, and down the other long side wall.
I used the hot glue to fold over and keep the short ends down.
I used hot glue to adhere large white rickrack to cover the ends and add a decorative touch.
I glued the house to a base made from a thick piece of cardboard covered in batting. Then I used my felt scraps to cut out a door, windows and lots of yummy candy to decorate the house with over and over again!
This was SO EASY to make! The longest part was cutting out all those cute little candy decorations, but it was totally worth it, because my kids love it!
I am sharing this craft at the following blogs:
Wednesday, November 3, 2010
Fall Leaf Garland
With Halloween over, I've started packing up the ghosts and pumpkins, but still wanted to have a few nice fall decorations around as we get ready to celebrate Thanksgiving. I had purchased a package of artificial fall leaves awhile ago that I used to spruce up my fall wreath.
I still had quite a few left and decided to use them to create a leaf garland that I could hang in my dining room. I had planned on sewing them together, but opted to use hot glue instead. It worked pretty well and I still get that flowing look of leaves. I really like they way the garland looks on my china cabinet. Super easy, but very pretty.
Subscribe to:
Posts (Atom)