CLICK HERE FOR FREE BLOGGER TEMPLATES, LINK BUTTONS AND MORE! »

Monday, January 24, 2011

My 100th Post!!!


Woo Hoo - Today is my 100th post!  I was trying to figure out a special post to do today in honor of my 100th post and decided to share some of my favorites with you.  Enjoy!

My Top Ten Favorite Craft Supplies
embroidery thread
ribbon
beads
Crayola Model Magic clay
fabric
ink
glitter
felt
buttons
cardstock

My Top Ten Favorite Crafting Tools
Sewing Machine
Glue Gun
Label Maker
Paper Cutter
Rotary Cutter
Cricut
Cuttlebug
Mod Podge
See-Through Ruler
24 x 36 Rotary Mat

My Top Ten Favorite Places to Shop for Crafty Things
Michaels
Joanns
Goodwill
Church Thrift Shop
Yard Sales/Flea Markets
Target
Walmart
Home Depot/Lowes
Dollar Store
Grocery Store

My Top Ten Favorite Places to Craft
Spread out on the living room floor
Spread out on the dining room table
My craft space (aka - multi-purpose room/pantry)
On our front porch
In the minivan (while waiting to pick up kids from school)
On my bed
Poolside (in the summertime)
By the firepit (perfect on cool nights)
On the sofa
On the computer

My Top Ten Favorite Crafts I've Blogged About
Pretty Canvas Shoes
Therapy Packs
Headband Roll
Reusable Felt Gingerbread House
Halloween Pillowcase Dress
Fleece Pocket Scarves
Jumper to Apron
Twine Vase
Monogrammed Tote Bag
Fairy Birthday Party

My Top Ten Favorite Crafts For the Kids
Blow Paint Monsters
Flower Prints
Cheer Sticks
Faux Gingerbread Houses
Stained Glass Painting
Christmas Activity Chain Link
Draw a Rhyme Story
Beachy Keepsake Jar
Millions and Jillions of Bubbles
Leaf Tokens

My Top Ten Favorite Craft Books
Doodle Stitching by Aimee Ray
One Yard Wonders by Rebecca Yaker
Sew What Skirts by Francesca DenHartog
Sewing Clothes Kids Love by Nancy Langdon
Handmade Home by Amanda Blake Soule
Sewing Bits and Pieces by Sandi Henderson
Green Crafts for Children by Emma Hardy
The Handmade Marketplace by Kari Chapin
Martha Stewart's Encyclopedia of Sewing and Fabric Crafts by M. Stewart
Simple Times: Crafts for Poor People by Amy Sedaris

My Top Ten Favorite Quick Party Treats
chocolate covered pretzels
chocolate covered marshmallows
monkey munch
rice krispie treats
fruit kabobs
yogurt & granola cups
veggie pizza
pigs in a blanket
mini bagel pizzas
microwave smores

My Top Ten Favorite Recycable Items for Crafting
toilet paper/paper towel tubes
oatmeal canisters
caps/lids
jelly/pickle jars
CD cases
cardboard boxes
newspaper/magazines
soup cans
old greeting cards
egg cartons

My Top Ten Favorite Upcoming Crafts
marble run
easy science experiments
Disney shirts
bathroom sign
canister sleeves
power cuffs
fabric play food
ruffle bag
lapbooks
subway art

Thanks so much for stopping by today to help me celebrate my 100th post!  If you get the chance, take a second and leave a comment telling me what your favorite post has been here at The Muddy Princess and what you are most looking forward to seeing in the upcoming craftiness.  And, as always be sure to share TMP with your friends, because the more, the craftier!

Saturday, January 22, 2011

Heart Hair

Before I got my daughter's hair cut, it was pretty long.  And last year, she allowed me to play with her hair.  For Valentine's Day, we made these cute heart hair styles, thanks to some inspiration from The Story of a Princess and Her Hair blog.  If you haven't checked out this blog before, be sure you do.  She has so many cute hairstyles to try, with instructions!


Since we have shorter hair now, we'll have to see what cute style we can come up with this year.  Happy Valentine's Day!

Friday, January 21, 2011

Family Recipe Boxes

This post is a little late, but it all turned out so well I just had to share it.  I helped my son's teacher and his first grade class put together these family recipe boxes.

I ordered these adorable gingerbread boxes from Oriental Trading Company and was very pleased!  Each child received a gingerbread house box and this whole big sheet of stickers - they were in heaven!


A few weeks prior to this activity the teacher sent home a note requesting a favorite family recipe used during the holidays.  We received all kinds of tasty recipes from Cabbage Rolls and Kalakand to Chicken & Hot Peppers and Pastice.  There were also lots of traditional recipes for goodies like Snickerdoodles, Pumpkin Roll, and Buckeyes.

I found Alenka's site where I was able to type in the recipes and print them out on recipe cards, for FREE!


The kids worked really hard on these!  Each student decorated a gingerbread house, then received one copy of each of the recipes to put inside.  It was a really neat gift for them to take home to their families.

Recycled Valentine Crayons

I bought these silicone heart shaped trays from the Target dollar bins a few years ago.  I'm pretty sure I've seen them at our Dollar Store too.  These were perfect for making heart shaped recycled crayons for Valentine's Day.


The first thing you need to do is set your oven to preheat to 200 degrees.  While the oven is preheating, choose the colors you want to use for your crayons.  The better quality of the crayon, the better it will melt and hold together.  Peel the paper from your crayons and break them into small pieces.


Place the broken crayons, into the tray.  You can group like colors together or mix them.


Place the silicone trays onto a cookie sheet and bake for about 15-20 minutes, keeping a careful eye on the melting process.  When the crayons look fully melted, remove them from the oven and allow to cool for about 10 minutes, then pop them out of the mold.

I used glue dots to attach them to small cardstock cards as Valentine's for my daughter's preschool class.  We also put some in a goodie bag, tied off with ribbon, to give to the teacher for the class to use.


Wednesday, January 19, 2011

Beaded Ribbon Necklace

I found these simple but cute wooden beads at American Science & Surplus for only $1.50 for a package of 150!  Seriously, this place is so cool, and is not only heaven for my science loving son, but for his crafty loving mommy too. 

So, I decided I wanted to use the beads to make a fun little necklace.  I used some navy ribbon and looped it around each bead.


I used some miscellaneous pieces I had to create the back of the necklace.  I tied off the ends of the ribbon onto the small chains, then attached a hair elastic between the chains.  The elastic actually worked out really great, because it gives the necklace enough stretch that I can put it over my head, but keeps it short while wearing.

I had a hard time taking a picture of myself wearing the necklace, so here is just the necklace itself.  As you can see in the pic, I also added two specialty beads I had.  They are a kind of terra cotta color with navy designs, so they blend in really well.  It didn't take long to put together and I thought it turned out pretty cute!


Tuesday, January 18, 2011

Valentine Table Display

I finally got all of my Christmas decorations put away and quickly pulled out my Valentine's Day decorations.  I only have a few items, but really enjoy the simplicity that the colors of this holiday bring, especially during the dreary winter.
I had some artificial roses left over from a project I never started, so I finally put them to good use.  I used these styrofoam cubes (purchased for yet another project never started) to create a simple table display.


The roses were already trimmed from the bunch they came on and had a two inch stem.  I pushed them into the cube, making three rows of three flowers.  I put all the white roses in one cube, all the pink in another and all the red in another. 


I wanted to group these together, so I first rubberbanded them, then used masking tape to hold the three cubes together.


And last, I used a piece of scrap faux leather fabric to wrap around the styrofoam cubes, and added some coordinating ribbon for a neat finish.  I just used hot glue to attach the fabric and ribbon.  I love the way this simple display turned out!


Sunday, January 16, 2011

Snow Fun!

If you were like me, and were a slacker about putting away the sand toys at the end of summer, don't fret! You can use those sand toys and buckets to make some pretty cool snow castles.

My daughter actually came up with the idea when she filled just one small bucket with snow and realized she could make snow castles. We pulled out a few of our other small buckets and sand castle shapes and built in the snow for a while. I think snow packs even better than wet sand!


Saturday, January 15, 2011

Cheer Sticks

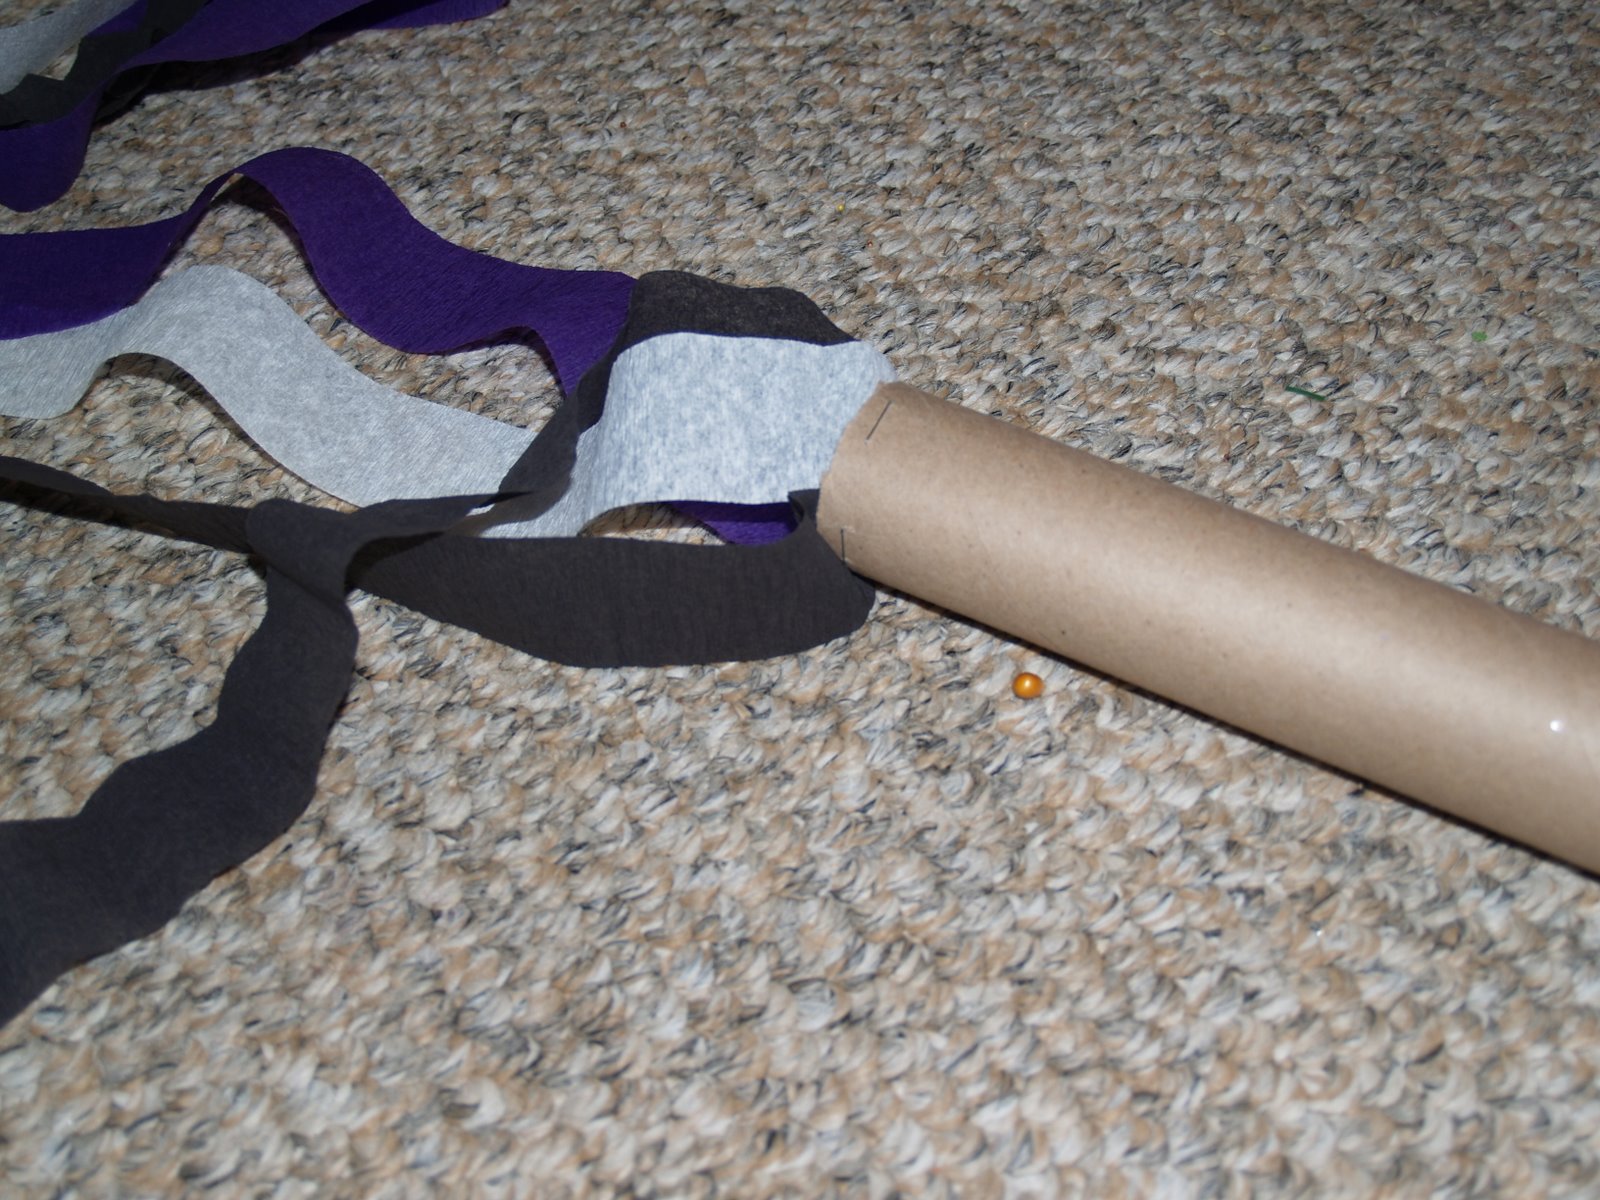
We are cheering on our hometown team, the Ravens, in the playoffs.  To help the kids cheer them on, we made some cheer sticks using some empty paper towel tubes and leftover party streamers.
 

We cut some strips and stapled them inside the ends of each tube.


Next, we applied some Mod Podge along the outside of the tube and
wrapped the party streamer around the tube.
Fun and simple!  Now it's time to cheer on the team!

Wednesday, January 12, 2011

Pressed Penny Coin Tube

Over the holidays, the kids found out we are going back to Disney World!  We went for the first time this time last year and had a good time, but unfortunately, our daughter got really sick our second day there, and missed out on a lot of fun.  My husband and I were both feeling pretty bummed about it, so we worked some things out to make another trip.  Fingers crossed everyone stays well this time!
I've been working on a few goodies for the kids to take along with them, including this coin tube.  My kids love to make those pressed pennies wherever we go, and Disney World was no exception.  The problem was, every time they spotted one of the machines, we had to dig in our bag for change.  Hopefully this tube will help solve that problem and give the kids a convenient place to hold their quarters and pennies to fund their pressed penny collection.

I found these mini M&M tubes on After-Christmas-Clearance for just a few cents.

After the kids ate the candy, I removed the wrapper.


Next, I cut some Disney scrapbooking paper into strips to cover the tubes.


Using Mod Podge, I adhered the strips to the tubes.
I used about 3 coats to make sure they stayed put.


To get the kids involved, I had them sort out the quarters and pennies they would need.
They created a pattern - quarter, quarter, penny,
since you would need 2 quarters and a penny each time you wanted to make a pressed penny.
They added them to their tubes.


And here is the finished project!
They were really simple to make and hopefully will prove very useful.

I'm back!

I'm really sorry I've been MIA for so long.  Christmas came like a whirlwind and so did an awful sinus/ear infection that left me feeling tired and light-headed for almost 3 weeks.  I'm finally on the mend though and having more energy to get back into my regular routine, especially blogging.

I have so many new ideas to share with you, including some fun winter crafts, repurposed clothing projects, Valentine's Day crafts, and much, much more!  I'm also nearing my 100th post - woo hoo!  So, spread the word about The Muddy Princess to your friends and family and have them become a follower today.  No one should miss out on all the crafty fun!